I think that a good environment for a preschooler should be one that naturally encourages exploration and playful learning. So I have tried to set up our house to do exactly that. A Montessorian would call this a prepared environment, and unschooler would call this strewing...I just call it our home. And here is a behind the scenes look at how we have it set up.
If you notice we tend to have an area for the kids in almost every room of the house. I do this for several reasons:
-The first and most important is that it keeps kids busy, and a busy kid is a good thing in my book. A bored kid often tends to get into things that they shouldn't. A bored kid often tends to fight with their sister or brother. And a bored kid is also usually "high maintenance" and makes it so it is hard to get anything done around the house.
-The second reason is that I don't spend all day in one room. My kids naturally tend to follow me around wherever I go, and this gives them something to do as they move from room to room.
-The third reason I do this is because I feel strongly that this is our kid's house too! Just like my husband and I have something of "ours" in every room, so do our kids. It doesn't seem natural to us to confine them to one room or area.
Our listening Center:
Our listening center is in our family room next to the couch where we usually read together. The kids have several audio books and musical CDs that they can listen to here. The listening center has a comfy ottoman for laying on while reading, a CD player that is easy for a toddler to work, and plenty of floor space for dancing!
Our Favorite Listening Center Products:
-Themes To Remember, Volume 1 ,
,
- Wee Sing Nursery Rhymes and Lullabies,
- Poetry Speaks to Children (Book & CD) (Read & Hear)
- Various Audio Books for Children (Purchased or record your own)
Our Library:
Near our listening center, we have our home library. This is several bookshelves that hold all of our families books. We try to keep these organized by subject. My husband and my books are on the higher shelves, the kids books are on the lower shelf.
Water Serving Station:
I try to encourage the kids to help themselves to their own snacks and drinks. We have a little water serving station sent up for them. You can see the blog post about it here.

Update: Since that post was published, the water station has now now been moved to the kitchen on the linoleum floors due to too many spills on the carpet! :) We also keep everything on a small table. Other than that, the setup and equipment remains much the same.
Our "Classroom":
This is what I affectionately call our classroom. Although it is really our dining room. This picture was taken in early February, so as you can see we have it all decked out for Valentine's day. This has a small child sized table that we use for painting and other activities that are best done sitting.
Here we have two little "learning shelves" set up. You can see them next to either side of our hutch. One we call our "Language Arts shelf" and the other we call our "Montessori Shelf".
We use the tops of these shelves to house all of our theme books for the month. This particular month, we were reading and talking about John James Audubon and Groundhogs. (The groundhogs are because of groundhog's day.) Interesting combination...wouldn't you say?
On the "Language Arts" Shelves:
On top of the bookcase:
Our "theme" books for the month. (This month we are studying Groundhogs, Weather, Shadows, and Hibernation in honor of Groundhog's day.)
Top Shelf (left to right):
Blue Basket - Mat Man Building Supplies
Wooden Box - Wooden Pieces for Capital Letters
Workbooks (Let's Cut Paper! (Kumon First Steps Workbooks) , Let's Sticker & Paste! (Kumon First Steps Workbooks)
 , and HWOT Get set for School Workbook)
Middle Shelf (left to right):
Wooden Box for HWOT Wet, Dry, Try Technique Tools (Slate , Little Chalk Bits, Tiny Sponge Cubes)
Sandpaper Letters from Polliwog Learning on Etsy.com
Tub of Tiny Crayon Pieces (The tiny pieces help force the child to grip them correctly)
HWOT Stamp-n-See Screens
Bottom Shelf (left to right):
Green Basket - HWOT Roll-a-Dough Screens, Homemade Playdough (recipe here)
Larger Green Basket - HWOT Capital Letter Cards and Blue Mats
On the Montessori Shelves:
On top of the bookcase:
Our Art books for the month. (This month we are studying John James Audubon.)
Top Shelf (left to right):
- Yellow Basket -Melissa & Doug See & Spell
- Sandpaper Numbers from Polliwog Learning Products
- Clear Zipper Pouch - Melissa & Doug Beginner Pattern Blocks
Middle Shelf (left to right):
- Wooden Box-Melissa & Doug Bead Sequencing Set
- Second Wooden Box - Various Magnet exploration items (Magnetic Balls , Magnetic Wands
 , Stack and Match Magnet Rings)
- Red, Yellow, Blue and Green Wooden Boxes -Montessori Knobless Cylinders
Bottom Shelf (left to right):
- Various Beading Activities (Melissa & Doug Deluxe Wooden 27-Piece Lacing Beads in a Box )
)
- Plan Toys Cone Sorting
-
- Twist & Turn Sorter
This side of the room has our calendar and "weather" tracking stuff. We also have an easel
 out for the kids to write on when ever they want.
Kitchen:
In the kitchen, the kids have their own little broom center where they can easily reach their tools when it comes to clean up time. We use got this broom set here for the kids and have been very happy with it. The vacuum cleaners are called Super Vac Toy Vacuums
 . They really suck up small bits of dirt! (Very small, but every little bit helps!) We bought ours through Amazon, however I see that they are currently unavailable. When it comes to clean up time, the kids also have some spray bottles (with vinegar and water) and some rags/sponges. They help me wipe down the table and winters in addition to helping me clean the floor.
We also have an area for the kids to hang their aprons up next to mama's aprons.
Our Basement / Playroom:
The basement is where we keep most of our toys. Although we try to have a "play area" on every floor of our house. (It keeps the kids busy and out of trouble!) Here are some photos of our main play area.
Links to Become Attached To:
-Don't waste your Homemaking
-Homemaking Link-Up
-Tot Tuesday
- Tot School
-We Play
- Montessori Monday
- Preschool Corner
If you notice we tend to have an area for the kids in almost every room of the house. I do this for several reasons:
-The first and most important is that it keeps kids busy, and a busy kid is a good thing in my book. A bored kid often tends to get into things that they shouldn't. A bored kid often tends to fight with their sister or brother. And a bored kid is also usually "high maintenance" and makes it so it is hard to get anything done around the house.
-The second reason is that I don't spend all day in one room. My kids naturally tend to follow me around wherever I go, and this gives them something to do as they move from room to room.
-The third reason I do this is because I feel strongly that this is our kid's house too! Just like my husband and I have something of "ours" in every room, so do our kids. It doesn't seem natural to us to confine them to one room or area.
Our listening Center:
Our listening center is in our family room next to the couch where we usually read together. The kids have several audio books and musical CDs that they can listen to here. The listening center has a comfy ottoman for laying on while reading, a CD player that is easy for a toddler to work, and plenty of floor space for dancing!
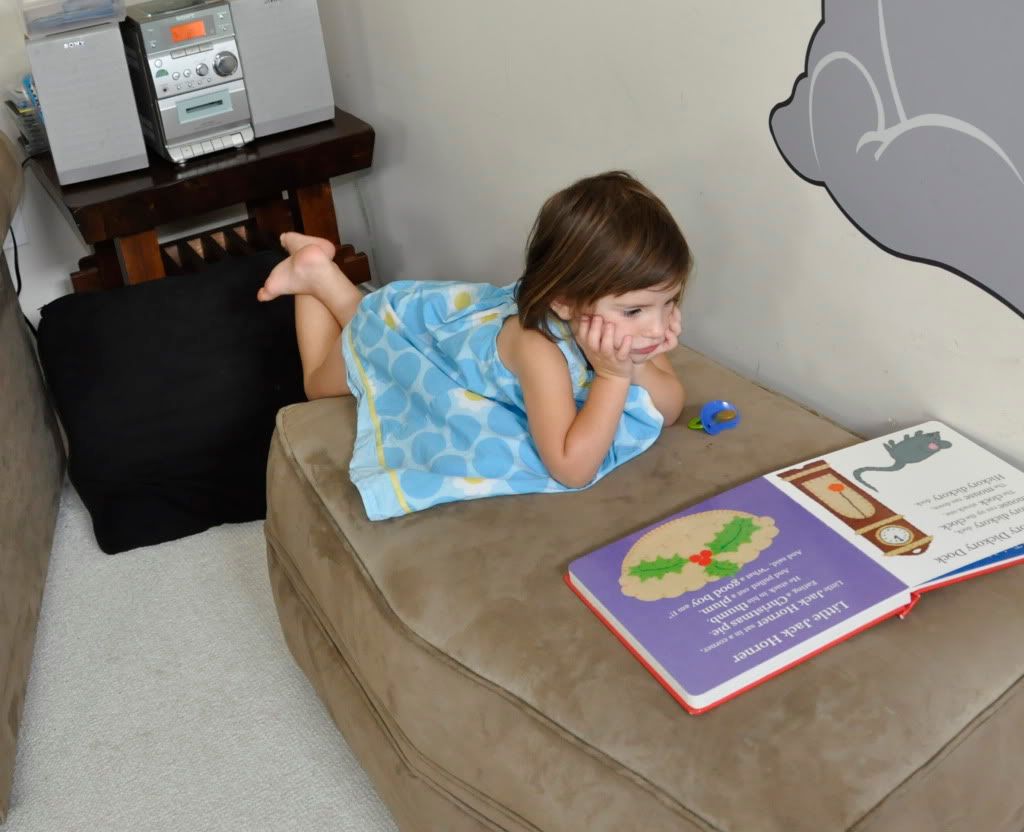 |
| Sophia listening to a Nursery Rhyme CD while following along. |
-Themes To Remember, Volume 1
,- Wee Sing Nursery Rhymes and Lullabies,
- Poetry Speaks to Children (Book & CD) (Read & Hear)
- Various Audio Books for Children (Purchased or record your own)
Our Library:
Near our listening center, we have our home library. This is several bookshelves that hold all of our families books. We try to keep these organized by subject. My husband and my books are on the higher shelves, the kids books are on the lower shelf.
Water Serving Station:
I try to encourage the kids to help themselves to their own snacks and drinks. We have a little water serving station sent up for them. You can see the blog post about it here.
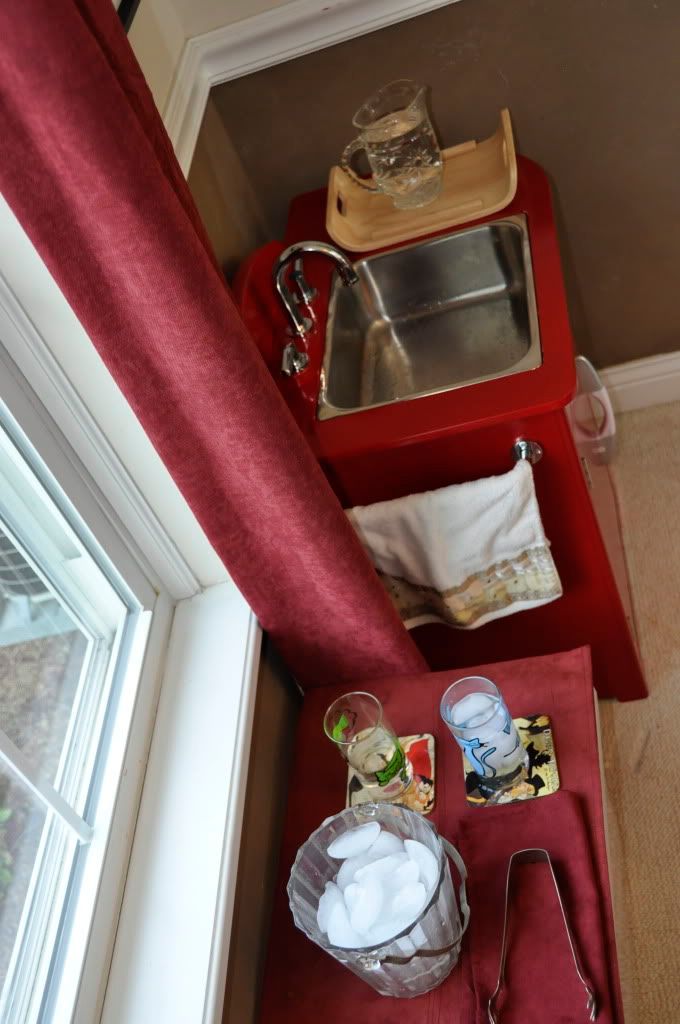 |
| Help yourself to a glass of water |
Our "Classroom":
This is what I affectionately call our classroom. Although it is really our dining room. This picture was taken in early February, so as you can see we have it all decked out for Valentine's day. This has a small child sized table that we use for painting and other activities that are best done sitting.
 |
| Our "Classroom" |
We use the tops of these shelves to house all of our theme books for the month. This particular month, we were reading and talking about John James Audubon and Groundhogs. (The groundhogs are because of groundhog's day.) Interesting combination...wouldn't you say?
 |
| Our "Language Arts" Shelf - It has a lot of our Handwriting Without Tears (HWOT) Curriculum |
On top of the bookcase:
Our "theme" books for the month. (This month we are studying Groundhogs, Weather, Shadows, and Hibernation in honor of Groundhog's day.)
Top Shelf (left to right):
Blue Basket - Mat Man Building Supplies
Wooden Box - Wooden Pieces for Capital Letters
Workbooks (Let's Cut Paper! (Kumon First Steps Workbooks)
, Let's Sticker & Paste! (Kumon First Steps Workbooks), and HWOT Get set for School Workbook)Middle Shelf (left to right):
Wooden Box for HWOT Wet, Dry, Try Technique Tools (Slate , Little Chalk Bits, Tiny Sponge Cubes)
Sandpaper Letters from Polliwog Learning on Etsy.com
Tub of Tiny Crayon Pieces (The tiny pieces help force the child to grip them correctly)
HWOT Stamp-n-See Screens
Bottom Shelf (left to right):
Green Basket - HWOT Roll-a-Dough Screens, Homemade Playdough (recipe here)
Larger Green Basket - HWOT Capital Letter Cards and Blue Mats
 |
| Montessori Shelf |
On top of the bookcase:
Our Art books for the month. (This month we are studying John James Audubon.)
Top Shelf (left to right):
- Yellow Basket -Melissa & Doug See & Spell
- Sandpaper Numbers from Polliwog Learning Products
- Clear Zipper Pouch - Melissa & Doug Beginner Pattern Blocks
Middle Shelf (left to right):
- Wooden Box-Melissa & Doug Bead Sequencing Set
- Second Wooden Box - Various Magnet exploration items (Magnetic Balls
, Magnetic Wands, Stack and Match Magnet Rings) - Red, Yellow, Blue and Green Wooden Boxes -Montessori Knobless Cylinders
Bottom Shelf (left to right):
- Various Beading Activities (Melissa & Doug Deluxe Wooden 27-Piece Lacing Beads in a Box
)- Plan Toys Cone Sorting
-
- Twist & Turn Sorter
This side of the room has our calendar
and "weather" tracking stuff. We also have an easel out for the kids to write on when ever they want.  |
| Our Calendar Center |
Kitchen:
In the kitchen, the kids have their own little broom center where they can easily reach their tools when it comes to clean up time. We use got this broom set here
for the kids and have been very happy with it. The vacuum cleaners are called Super Vac Toy Vacuums. They really suck up small bits of dirt! (Very small, but every little bit helps!) We bought ours through Amazon, however I see that they are currently unavailable. When it comes to clean up time, the kids also have some spray bottles (with vinegar and water) and some rags/sponges. They help me wipe down the table and winters in addition to helping me clean the floor. |
| Kid's Cleaning Supplies |
 |
| Hang up your apron please! |
 |
Our Nature Study Basket (Has the kids Nature Notebooks, my Nature Journal, some field guides, and Handbook of Nature Study ) ) |
Our Basement / Playroom:
The basement is where we keep most of our toys. Although we try to have a "play area" on every floor of our house. (It keeps the kids busy and out of trouble!) Here are some photos of our main play area.
 |
| Play Kitchen Center |
 |
| Another Picture of Kitchen and Grocery Store Center (We have a kitchen, a baby bed/high chair, grocery carts, and a cash register to encourage dramatic play) |
 |
| Shelf Near Kitchen (This holds the Puzzles, Melissa and Doug Latches Board, Larger Wooden Food Pieces, matryoshka dolls, etc.) |
 |
| Train Table: We switch this out from time to time and rotate new activities |
 |
| Playroom Wall |
 |
| Bookcases full of toys We have our block center here near the bottom right. |
 |
Close up of the "Building Center" (Design and Drill , Pound and Roll Tower , Pound and Roll Tower , Melissa & Doug Deluxe Wooden Pound-A-Peg , Melissa & Doug Deluxe Wooden Pound-A-Peg , Various Pretend tools) , Various Pretend tools) |
 |
| Chalk Board Magnetic Wall, Building Center and Small Table |
 |
| Dress Up Clothes and Props- I Still need a mirror for this area so the kids can check themselves out |
-Don't waste your Homemaking
-Homemaking Link-Up
-Tot Tuesday
- Tot School
-We Play
- Montessori Monday
- Preschool Corner


 written and illustrated by 7 year old Benjamin Kendall.

 .
.
 The kids both enjoyed this story and I read it multiple times too this week. This book also had my chuckling. My favorite part is the illustration of Alistair ironing his socks before he leaves for space.




 . Moon sand is a great material that even adults love to play with. It has a really cool consistency. It is like sand that can be molded and hold its shape. The con is that it can be quite expensive.


