Monday, August 23, 2010

We Play....

...OUTSIDE!

Ahhh...the weather in my neck of the woods is simply marvelous.  It is a great time to be outdoors.  I can't get enough of the sunshine, the warm breeze, and moderate temperatures.  The weather is so beautiful that it makes getting outside to play irresistible.

So instead of posting this week about our play with toys, bikes, or paints--I would like to devote this blog entry to the lost art of just getting outside and PLAYING!

Do you remember what it was like to be a child?  Did you have a favorite tree to climb?  Can you remember finding a secret place in the woods that seemed to belong only to you?  Did you once gather "treasures" from outside (shells, rocks, leaves, flowers) and take them home to cherish?  Do you remember what it is like to skip a stone on the water?  Or search for the perfect stick or pine-cone? 

I have noticed that many children today don't get to enjoy the simple pleasure of getting outside to play.  They are in school for a good portion of the day.  They then go off to various scheduled practices and activities.  And what precious little down time they do have left in the day is spent playing video games, watching TV, or surfing online.

If we don't make it a priority to go outside and play, then it is easy to pass over all of those simple joys of childhood. 

We had two recent adventures in nature.  Our first was a nature walk to Inniswoods Metro Park

The kids spent a lot of time on their walk gathering and observing things from nature.  Things that had special importance to them. 

Marcus searches for a chipmunk in the woods

Here Marcus finds an acorn and stops to take a closer look.

Sophia finds a special leaf.  She notices that this leaf has "bite" marks on it.


We noticed that there were "seeds" in the center of this flower.  Later we saw some goldfinches snacking on these seeds. 

We saw some HUGE tadpoles swimming in the water
The kids had fun climbing on this stump...
...and then jumping off.

Later, we enjoyed the shade of a tall maple tree.

Our second adventure was spent at Highbanks Metro park in their new "Natural Play Area."  The natural play areas were created to give all kids in central Ohio the chance to interact with nature in a more unstructured and direct way.  Kids can go off trail, splash in streams, dig in the dirt, and climb trees. 


We spent to the majority of our time in the water.  (Kids are naturally drawn to water!)
Sophia had no hesitation about going in the water.  She jumped in and began to explore.
Marcus was a bit hesitant at first and decided to explore the water from the edge at first. 

Sophia's own version of spear fishing.  She attempts to poke a minnow. 

She stayed busy with the stick for awhile. 

I thought that she was going a little "Lord of the Flies" on me for awhile! 
Until her "spear" broke.  :( 
Marcus finally decided to join his sister in the water. 


A very pretty dragonfly.
Are you ready to go and play outside?
Here is my list of recommended reading and resources: 

Books-

Handbook of Nature Study by Anna Botsford Comstock
Make an investment and go purchase this book.  This really is a book that you will be glad to own.  I know the title sounds boring, but I promise you it is not.  This book is so fun to read.  I love to have it on hand to look things up.)
HANDBOOK OF NATURE STUDY

Last Child in the Woods: Saving Our Children From Nature-Deficit Disorder by Richard Louv
Last Child in the Woods: Saving Our Children From Nature-Deficit Disorder


The Little Hands Nature Book by Nancy Castaldo
The Little Hands Nature Book (Williamson Little Hands Series)


Online Resources:
Handbook of Nature Study Blog - A blog devoted to getting out and experiencing nature!  I love reading this blog and plan to start participating in her weekly outdoor challenges.  I consider this our challenge number 1.  :) 

Childhood 101 - This blog hosts a weekly blog carnival called "We Play"  It has many, many great ideas about playing outside on it.
Friday, August 20, 2010

My New Favorite Play Dough Recipe


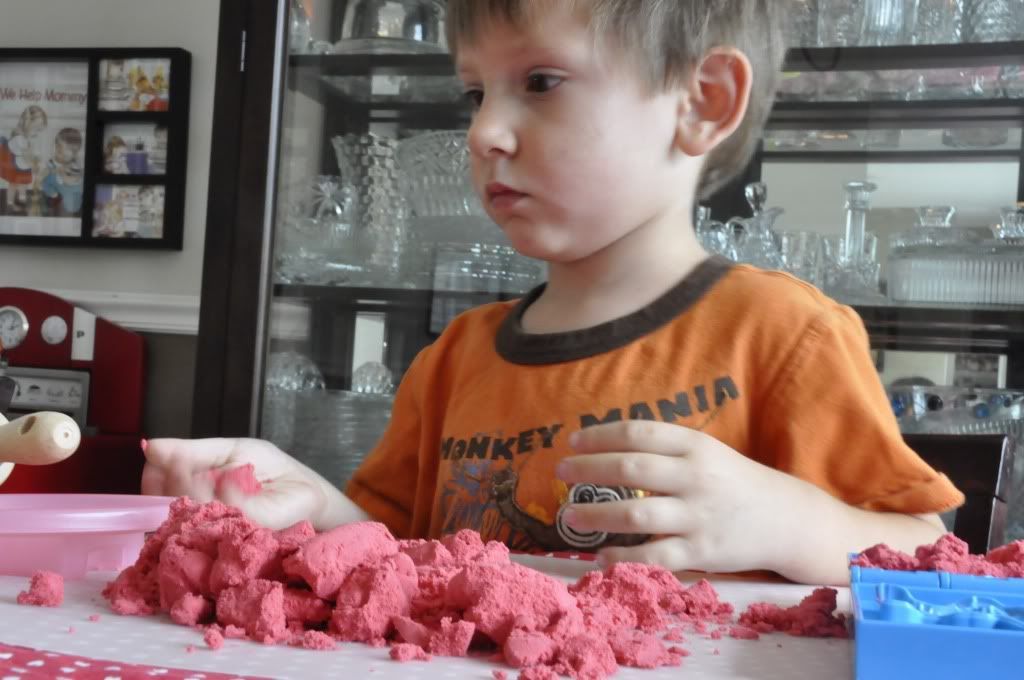
This morning I made a batch of homemade playdough for Marcus and Sophia.  I colored it red and scented it with real ground cinamon.  If I do say so myself, it smells, looks, and feels divine.

So by request from some of my facebook friends,  here is my NEW favorite play dough recipe.  My old favorite play dough recipe was from MaryAnn Kohl.  That recipe is a great one too.  However, this recipe surpasses it in both texture and logevity.  (If seals in an airtight container, this dough will last a very long time.)

This dough also has a texture that is out of this world.  I can't do it justice by describing it in words.  It is very, very soft and just feels so much better than the canned play dough you can buy.  It comes off the stove hot and sweet smelling.  And the kids and I love playing with it while it is still warm.  It is a total sensory experience and perfect for young, curious toddlers. 

This recipe only takes a second to whip up and is very economical to make.  Very young kids can help too with the pouring, measuring and mixing.  Which means you are not only making play dough, you are making memories.  (Home made things are always filled with lots of love.) 

This recipe comes from My Montessori Journey.  And if you haven't checked out that blog, you are missing out!  It is filled with so many great ideas.

My Montessori Play dough Recipe
1 c. flour
1/2 cup salt
1 T. cooking oil
1 T. cream of tartar
1 c. water
Food coloring of your choice
Add-ins of your choice (i.e. spices, extracts, glitter, essential oils, etc.)

Stir ingredients together well.  Just measure them into the saucepan you will be using to cook the dough, but mix them well before heating up the pan.  Over medium heat cook the dough, stirring constantly until it forms a ball.  (NOTE:  When it starts to pull away from the sides somewhat and clump together and most of the "wet-looking" parts look dry, it's ready to remove from the pan.)  Turn dough onto a board (or the countertop) and knead until very smooth.  (NOTE:  It will be pretty warm to the touch, but try to knead it until it becomes a nice, smooth ball.  If it feels sticky, you can work a little more flour into it and it will be fine.)  Cool.  Store in a covered plastic container OR in a sealed ziploc bag. (ANOTHER NOTE:  This dough does seem to always stick in the saucepan somewhat.  I have tried spraying the pan first, but I still have a crusty residue on the pan when I'm finished.  I am used to this now and just plan on soaking the pan after I make a batch.  I just wanted you to know about that though so you wouldn't think you had goofed something up if that happens.)


As for how much spice, extract or food coloring to add in.  I usually never measure this.  I just slowly stir it in until I get the desired color and scent.  I probably add approximately 1 Tbsp of spice if I were to guess.   I also recomend the food coloring from wilton.   We usually have some left over from the kids birthday cakes that I make.  I have so much better luck getting the exact color I am aiming for when I use wilton brand food coloring.

I have also had luck adding in Essential Oils to this.  I made a lovely lavender colored and scented play dough this spring.   Like I said, this dough lends itself to many creative options.


Have fun and make the recipe your own.   My Montessori Journey also gives many ideas for making seasonal play dough.
January--white dough with white glitter OR "snow dough" and a snowman or snowflake cutter; February--pink dough with red glitter and a heart cutter;
March--green dough with gold glitter and a shamrock cutter;
April--purple dough scented with lavendar oil and an egg cutter;  
May--yellow dough with lemon extract and a flower cutter;  
June--blue dough with a boat cutter;  
July--small balls of red, white and blue dough with a star cutter;  
August--yellow dough with gold glitter and a sun cutter;
September--plain dough (no coloring) with apple pie spices and an apple cutter (or red dough with apple pie spices);  
October--orange dough with pumpkin pie spices and a pumpkin cutter;
November--orange or brown dough with pumpkin pie spices and a turkey cutter;
December--gingerbread dough (use lots of cinnamon, allspice, ground cloves) with a gingerbread cutter OR green dough with peppermint extract and gold glitter and a tree cutter OR red dough with peppermint extract and gold glitter and a candy cane cutter.

For other fun "home made" dough themes check out Counting Coconuts.  She makes a weekly sensory tub and play dough each month.
Thursday, August 12, 2010

Hummingbird Apron

Here is a brand new apron made for a friend of mine.  My friend came to me with an apron problem, and needed some help solving it.  She has lots of cute aprons at home, but none of them are giving her the coverage she needs.  You know me, I love an apron challenge, so I was so excited to work on this project! 
You see, my friend is a very domestic woman.  She grows a lot of her own food and is very active in the kitchen.  She also has four small children.  So not only did she need an apron that would be beautiful, she needed an apron that would be functional as well.  While wearing her other aprons, the tops and sides of her shirt were still getting messy.  She also needed more coverage on the back so she could wipe her hands on her hips.  (I can so relate to that last point!)

While searching the internet, my friend came across this apron here.  She thought this might be the perfect design to give her the functionality that she needed.  We both thought that apron was amazing.  However, my friend decided that she wanted a bit more shape and definition in her apron design. 

After trading nearly 20 emails back and forth, we worked together to create this apron here.  And I think we came up with the perfect solution: 

As you can see, the apron has a very high neckline and wide shoulder line.  This will help give her the coverage that she needs.  This apron is also a workhorse apron.  All pockets, straps and seams are TRIPLE reinforced.  This apron, while beautiful, will stand up to little children tugging on the straps and as many washings and drying as she can put it through!

My friend gave me almost complete reign on choosing and coordinating the fabric.  (Which is a lot of fun for me!)  She told me that her favorite color is red and that she also likes owls and birds.  I thought that this fabric would be perfect for her.  I choose this fabric because it is a very modern fabric and color scheme.  I think that gives a new take on the nostalgic design of the apron.


The back is very cool if I do say so myself!  ;)  It has two straps that come down and attach to the waste.  This will help hold the apron top in place so that it won't ride down, up,  or slip.  (Another problem she was having with her other aprons.)  As you can see, the apron also gives plenty of coverage to keep the sides of her pants clean while working in the garden and kitchen.
As with all of the aprons I sew, I made the ties completly reversible.  Many homemade aprons only have the ties hemmed.  I personally do not like that because the wrong side of the fabric shows when you tie them.  (Pet peeve of mine!) 
I also made the straps extra long so that they could be tied in the front or the back.  (I personally like the ease of tying my apron in the front, so I try to build that into everything I sew.)


Well, thanks for looking! 
Sunday, August 1, 2010

The She She Dress

Here is a cute little dress that I sewed for Sophia.  For those of you who don't know, she calls herself "She-She."  So I named this dress the "She She Dress."
I really, really love the fabric of this dress.  It is called "Small Gatherings" in sea by Anna Maria Horner.  I kept the lines of the dress very simple so that it wouldn't distract from the fabric and I am very happy with how it turned out.  

 I also like this dress for practical reasons.  It is very comfy and will make a great all purpose playdress all year long.  In the summer she can wear it alone.  And in the fall it will look great layered with a denim jacket, leggings and boots.
The other great thing is that this is one of those dresses that will grow with her.  She can wear it now as a dress and eventually it can be worn as a peasant style tunic or shirt.  You gotta love that!

Well, thanks for reading!!  And yes, that is a garden gnome in my yard!! 
Monday, July 26, 2010

Montessori Monday: Water Serving

One of the things I appreciate the most about the Montessori method is the idea of setting up a child's environment so that they can have a certain level of independence.  I think that too often we under estimate the abilities of children.  I also think that allowing children a certain level of independence helps boost their self esteem.


If you visit any Montessori classroom you will probably see some type of pouring activity in their practical life section.  Students typically start our pouring with beans or other dry material and eventually move up to pouring with water.  I decided to put all of this pouring practice to use in our house by setting up a drink station for the kids.

How this station came about:
For awhile, I felt like I was filling up sippy cups all day long.  The kids would usually take a drink, set their cup down somewhere, lose it, and then ask for another sippy cup full of water.  Between the two of them I was filling up cups every 20 minutes all day long---and then going through the house and collecting all of the lost cups so I could wash them.  It was insanity.  I decided that a big part of the problem was our whole sippy cup set up.  Sippy cups don't require care.  You can just throw them down anywhere without having to worry about them spilling.  They almost invite the child to be careless with them.  Another part of the problem was that we simply had too many cups.  Lots of cups = lots of dishes! And finally, a huge part of the problem was that the children currently had no way of getting a drink for themselves. 

So I set off to think of a way to make this possible for them to do.  Some would call this neglectful parenting, I call it Montessori!  ;)

Here is where the kids are able to pour themselves a glass of water whenever they want.  Every morning I set out clean glasses, fresh ice, and fresh water.  The rest is up to them.   So far they have loved it! 

Here is a close up of the little side table I added to our sink.
 
It took some tweaking to find a setup that allowed the kids to do this independently. 
At first I tried storing all of this stuff next to the sink, but it was too hard for Sophia to reach around things without knocking over a cup.  She needed more room, so I used a clear plastic bin as a side cart to give them some counter space.   Even though it is just a plastic bin, I tried my best to dress it up and make everything look "pretty" and nice for the kids.  That way they would know that these glasses are something to be taken care of.  Not something you just throw on the floor.

One the side cart we have a glass for each child.  (Marcus gets the blue glass, Sophia gets the green.)   They also have an ice bucket, ice tongs, a coaster, and a napkin to store the tongs on. 

On the sink I am storing the pitcher of water that way they won't have to carry it anywhere. 
 It took a little tweaking to find a process that they were able to do independently.  What we finally found worked the best was to have the child fill their cup full of ice.  (They LOVE using ice tongs by the way!!)  Then place their glass in the metal sink and pour water using both hands on the pitcher.  (The metal sink is able to catch any spills.)  Then when they are finished, they know how to wipe up any spills and rehang the towel. 
To see what other Montessori inspired activities we have gotten into this past week, check our our weekly wrap up post here.
Sunday, July 25, 2010

Learning and Playing: Our week in review

Here are just a few highlights from Marcus and Sophia's week playing and learning....


Learning Trays:
I had the following learning activities on the learning shelves* for the kids--

1)  Animal Domino Set
Aren't these things cute?  I just love this toy.  These are made by Plan Toys and like most Plan Toys they are extremely durable and well made.   I love these dominoes particularly because they are extra large.  So even very little hands can be successful at stacking them and manipulating them.  Marcus and Sophia don't yet understand the rules of the classic dominos.  However, we played some matching and grouping games with these.   The kids also had fun setting up long domino chains and "huffing and puffing" them down like the big bad wolf.  The other activity that they came up with was using the dominos to build a train across the floor.   All in all this was a very popular tray that promoted basic math skills (matching and sorting); language skills (talking about the animals); fine motor skills (setting up domino chains); and creative skills (pretending to be the big bad wolf and building a train).  Not bad for a simple toy! 


2)  Nuts and Bolts Matching
I found these at a Once Upon a Child store near my house.  (That is where I buy most of our toys.)  These are old school Melissa and Doug Nuts and Bolts.  I can't find these on amazon anymore to link them up for you, so they must be pretty old.  The came in a wooden base that you can actually screw the nuts into, but that proved too difficult for Marcus and Sophia.  So, I took them out and put them on a tray instead so they could twist the bolts with their hand.  I like this particular nuts and bolts set because it emphasises both colors and shapes.  Each nut and bolt is a different color and shape.  The st is also self correcting.  (Only the yellow nut will match the yellow bolt.)

3)  Magnetic Dress Up Doll
Sophia really enjoys this toy.  It helps build vocabulary by teaching her to describe the dolls clothes.  It is also a good toy to practice dexterity as she has to manipulate the tiny little pieces to dress her doll.


4)  Star Counting Game
This was a practice in counting and math. Basically each laminated card had a picture of a spaceship a moon, and some stars.  At the bottom of the cards were three numbers.  (Different numbers were on different cards and they were not in any particular order.)  The child had to count the stars and then put the clothespin on the correct number.  I downloaded these cards for free from some site, but I now completely forget where I got them from. (I hate that!)   If anyone recognizes them, please leave a comment so I can give credit. 


5)  Lacing Cards
The kids see me sewing all of the time, so they were excited when I told them that they could sew with these cards.  However, they quickly lost interest in the lacing.  Instead they mostly pretended to eat the foam food.  :) 
6)  Fruits and Vegetables Cutting Set
You will have to forgive this picture.  As I type this, most of the fruits and vegetables are spread across the living room floor.  Very few got put back on the shelf like they are suppose to.  So I used the stock photo from amazon so you could see the toy we have. This is an ingenious idea for a toy.  The wooden fruit "components" are held together with strong velcro.  The child then uses a wooden knife to "cut" the toys apart.  Marcus and Sophia love pretending to cut the food and serve it to me.  This is an excellent fine motor activity.
 Plan Toys Assorted Fruits and Vegetables 
(Photo courtesy of Amazon.com) 
*To see more information on how we use our learning shelves, please visit this tot school post here. 
Other fun learning and playing:
We had a light alien unit theme going recently.  Marcus was interested in checking out some books about aliens so we just kind of went from there.  (Hence the space ship math activity above.  I made that to tie in with our theme.) 
We made Letter A's in the shape of aliens...
....And we made Alien Masks.
We also played with Moon Sand.  (Speaking of moon sand, I also found a recipe for making homemade moon sand.  I can share that if anyone is interested.  The commercial moon sand is so expensive, so I was glad to finally find a decent homemade version.) 
Marcus and Sophia also experimented with their hanging monkey toy.  They learned a lot about weights and balancing a scale with this. 
The kids also brought out their beginner pattern blocks.  They each choose which pictures they wanted to build with the shapes.  They were very proud of their creations so they each wanted me to take their picture why they laid by their work.  :)
 And we also made a Batman Letter B to add to our alphabet books. 
Sophia also hung out in our listening center while she read her nursery rhyme book while following along to the CD.  She just loved doing this!  This is a great activity for building print awareness.


..And as you know, we love books at our house!  These are the books that Marcus and Sophia chose to read this week.
 

Blog Template by BloggerCandy.com